

When you are working on a project in Cricut Design Space that uses text, it is really important to think about the final results you want so that you choose the correct type of font for your project. This will help you decide before you start the project if you want a writing font or cutting font, or even a multi layered cutting font.

By the way, this post contains Affiliate Links to companies I have partnered with, such as Amazon. As an Amazon Associate I earn from qualifying purchases. You can think of affiliate links like tipping your waitress, only it does not cost you anything extra! Thank you for shopping with my links!
Let me clarify what I mean when I say to think about the final results you want for your project.
- Are you using text and want to cut out letters for a card, scrapbook or other paper craft?
- Then choose a Cutting Font
- You could use either a Single Layer Cutting Font or a Multi Layer Cutting font
- Are you using text and want to cut out letters from vinyl projects?
- Then choose a Cutting Font
- You could use either a Single Layer Cutting Font or a Multi Layer Cutting font
- Are you using text and want to use pens to write out the text?
- Then you should choose a Writing Font for best results and the easiest way to achieve your project goals
- Continue to read on to learn a hack I have that allows you to use a Single Layer Cutting Font and have it fill in the letters. If you want to jump to that section, you want the section titled Fill in Cricut Fonts – Cricut Hack
Understanding Writing Font or Cutting Font
Over the years I have done several videos on Cricut fonts, and I even created a playlist for them on my YouTube channel. Many of the video were made prior to the last Cricut update so the Design Space screen might look slightly different, but the overall idea about the difference between a writing font or cutting font is still the same.
When you first click on the Text button in Cricut Design Space, the word Text will show up on the screen. Just start typing the words that you want for your project. and you will see them fill into the space where the word Text was. From this point forward you will need to click on the text in order to activate it and view the information about that font.
Once you click on the text, you will find that additional row of options shows up on the top panel. Click on the pull down by the word Font, which I have indicated with a pink arrow in the image below.

Clicking on this pull down will open up a list of fonts you can pick from, which you can see in the image below. There will be some tabs that will allow you to look at just Cricut fonts or just your System Fonts. Other tabs include your Bookmarked and Recent font choices. I have circled them in pink so you can more easily find them.
System fonts are any font that you have downloaded and installed onto the device you are using. For the most part, a System Font will be a Single Layer Cutting Font. There are some exceptions, but you can use this as a basic rule of thumb.

When looking at just the Cricut fonts, you can look at the details under the font names to see what type or style of font each one contains. I have circled this information in blue in the image above.
To the right of each font you will see a flag icon. I am pointing to it with the blue arrow in the image above. If you click on this flag icon it will add that font to your Bookmarked fonts. This is a great way to save some of your favorite fonts so you can find them again easily.
Now let’s look closer at how you can filter Cricut fonts by clicking on the filter button, which is indicated with a pink arrow in the image above and below. The filter will help you to refine your font choices and only see the ones that match your needs. Some of the filter names for the Cricut fonts are self explanatory, but I am going to go into the differences between a writing font and a cutting font in detail.

The high level explanation for each filter is listed below. Just to note, you can use these filters in different combinations, for example you could filter to see if there are any Writing fonts that are also All Caps fonts.
- All Caps – These are Cricut fonts that only contain capital letters. You will not need to use the shift key in order to produce a capital letter since there is no other option.
- Kerned – These are Cricut fonts that will automatically join together. Before the introduction of Kerned Cricut fonts we would have to manually move or adjust the letters so that they touched and weld them together to join them. I have a tutorial on that topic HERE.
- Multi-Layer Cutting – These are Cricut fonts that contain more than one layer in the design. Many of them automatically come with an offset or shadow layer. Before the Offset tool was added to Design Space, the only way to create designs with multiple colored layers was to use a Multi-Layer Cutting font. I will go into this type of font in more detail in the section about Cutting Fonts below.
- Single-Layer Cutting – These are Cricut fonts that only contain one single layer. I will go into this type of font in more detail in the section about Cutting Fonts below.
- Writing – These are Cricut fonts designed to be used with the Cricut pens. These are Cricut fonts that are only a single line, so they would mimic a person using a pen. I will go into this type of font in more detail in the section about Writing Fonts below.
- Handwritten – These are Cricut fonts that have a more organic or artistic look as they are attempting to appear as if someone wrote them. Personally, I feel like this category of Cricut fonts is misleading. Logically you would think that all of these fonts would work with the Cricut pens, but there are fonts in this grouping that are Single-Layer Cutting fonts. An example of a Handwritten font that is a Single-Layer Cutting font would be calligraphy style fonts or fonts that mimic a brushstroke.
- Free – This is my FAVORITE FILTER because I do not pay for Cricut Access, so I am always looking for what Cricut fonts I can use for free.
- Purchased – These are the Cricut fonts that you have purchased. This is another great filter for people like me who do not pay for the Cricut Access membership. If you see just one Cricut font that you really like, you can purchase just that font and then it will be yours to use forever. Then you do not have to join Cricut Access just to be able to use a larger variety of Cricut fonts.
- Downloaded – These are Cricut fonts that you have downloaded, which allows you to work with them and use them for projects when you are not connected to the internet. This does not mean that you own these fonts or that they are downloaded onto your computer so that you can use them in other programs.
Some fonts will have multiple font types available. If the font you choose has both a Writing and a Single-Layer for example, after you apply the font to your project make sure to look under Style pull down and pick the style you wanted to use. The Style pull down is located to the right of the Font pull down that we just looked at.
Writing Fonts – for Cricut Pens
If you want to use your Cricut pen in your machine to write the words, like I do when I am making cards, you would want to be sure to use a writing font with your text. A writing font is typically thinner and looks like something that could be created with hand printing or hand writing if you had really good penmanship.
As of June 2023, when I was updating this article, there are 420 writing fonts in Cricut Design Space. Even better, as you can see by my filter below, there are 21 of those writing fonts that are FREE!!!!

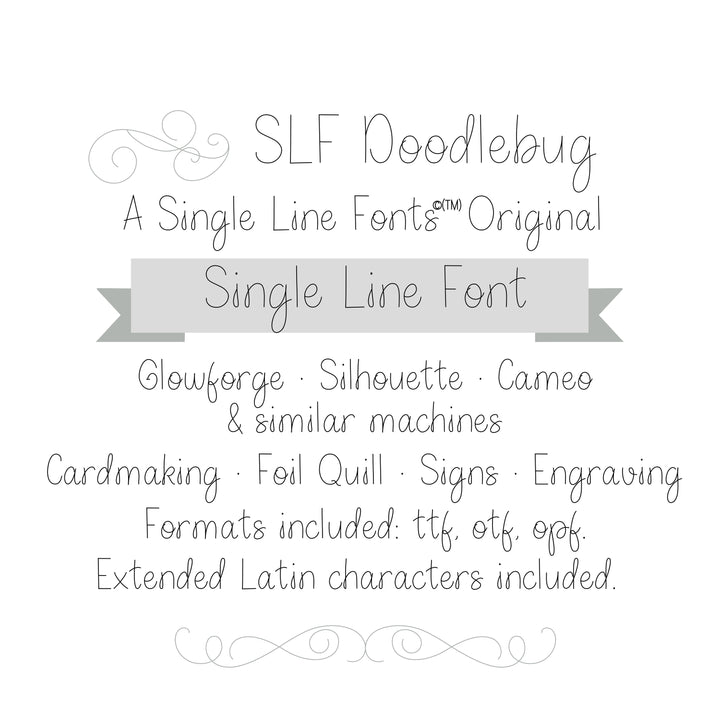
If you are looking for writing fonts that are not Cricut fonts, make sure you are looking for a single line font. I have found some really nice ones at the site Single Line Fonts
BONUS TIP: You can change the operation of a cutting font from Basic Cut to be drawn with the Cricut pens, but since the blade for cutting and the pen to draw these letters will follow the same path you will get what is commonly called “bubble letters”. This means that the Cricut will only draw the outline of the letters and will not color or fill them in. There is a trick that will allow you to fill in a “bubble” or outline font, and I go into that in the section called Fill in Cricut Fonts – Cricut Hack towards the end of this article.
EXTRA BONUS TIP: Do you know the saying that there is an exception to every rule. Well, here is the exception to the “rule” that you cannot fill in a writing font without using the Cricut Hack. I found that there is a font called Karley Sketch that is free in Cricut Design Space and it does fill in the letters of the font! I used this font on a birthday card for my daughter, who is a Taylor Swift fan.

Writing Cricut Fonts – Examples
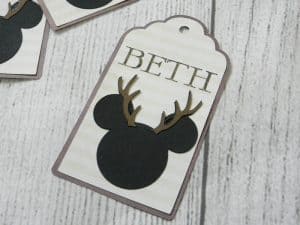
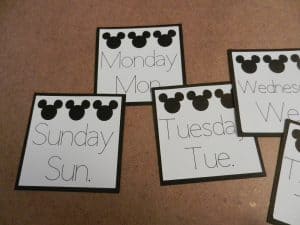
The images below all show examples of projects I have done using a Writing font. You can click on each image to go the the tutorial for that project. The first image shows gift tags that I created, and had the Cricut write the names on them. The second one shows how I used the Cricut pens to write the days of the week on a classroom calendar. The third image shows you how I use the Cricut pens to write the sentiments for the inside of cards that I make.

@shawnmosch Did you know that you can write with Cricut pens? #writingfonts #writingfont #cricut #cricuthacks #writethisdown ♬ Write This Down
Purchase your Cricut Pens now
There are not a lot of Cricut products that I recommend. I am not a fan of their vinyl. But one item I do recommend are their pens, which you can get on Amazon by clicking HERE. If you plan to do projects where you write with Cricut pens, then I feel like this large pen set is a must have!
Can I write with other pens?
Now that you know how to write with Cricut pens, you might be asking if you can write with other pens or markers you already have.. The answer is yes, if you have a special pen adaptor. One of my students was looking around at adators, and she found one on Amazon that she loves. You can purchase it HERE.
Below is a video she did of this pen adaptor in action!
Cutting Font
If you want your Cricut to cut the shape of a letter, out of cardstock or vinyl for example, you would want to choose a cutting font. The two main types of cutting fonts are Single-Layer and Multi-Layer, so let’s look at those in more detail using the examples in the image below.
The words Cutting Font in the dark teal are done with a Single-Layer Cutting font. There is just one color or layer to the design. The words Cutting Font in pink are done with a Multi-Layer Cutting font, but in the image below you might notice that there is only one color or layer visible. Because of this it LOOKS like it is a Single-Layer font.
If I click on the pink text and look at the layers panel to the right of the screen I can see that this font has two layers within it, but the layer with the number 2 in front of it is turned off. I know it is turned off because of the line going through the little eyeball icon that I have circled to the right of the font information for that layer.

If I click on that eyeball icon to turn that second layer on, now you can see in the image below that each letter has a second layer to it. Multi-Layer fonts give you so many more options in your crafting! You can use both layers together to create layers of color in your design, or you can use just one of the layers.
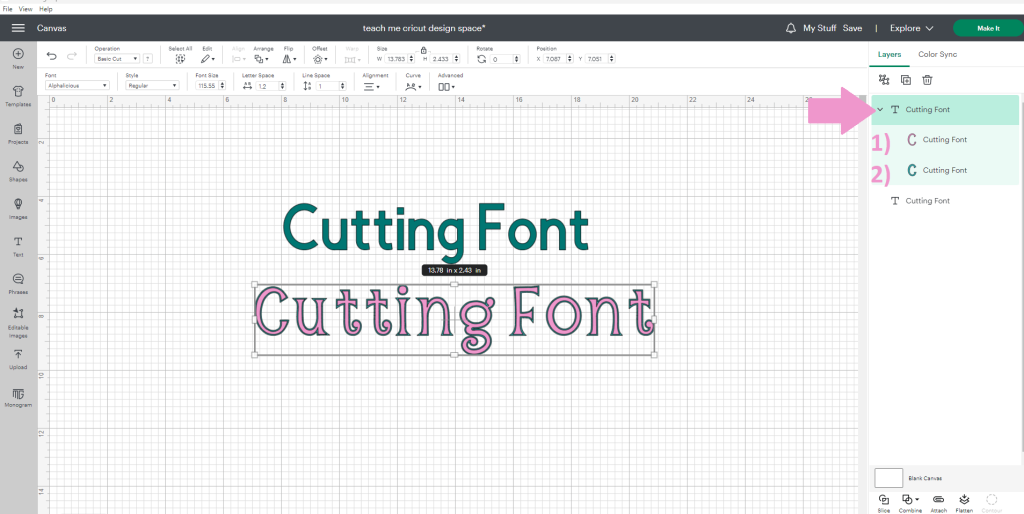
The mulit-layered font that I selected for this example has a perfect offset around each letter. This is a great type of font to use with you want to layer two colors over each other for your font. As of March 2021, Cricut has now added an offset feature. This will allow you to add additional layers to any font. To learn more about offset click HERE.
Cutting Cricut Fonts – Examples
The images below all show examples of Single-Layer Cutting Fonts. You can click on any of the images to be taken to the tutorial for that specific project. The first one is a can cozy that I personalized using iron on vinyl. I combined a SVG file I had and used the Text feature in Design Space to type up the name in a Single-Layer Cutting Font.
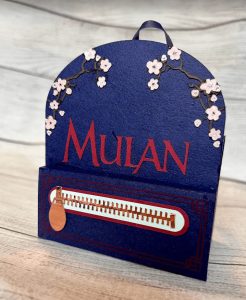
The second image is a cardstock backpack that I created. I cut the word Mulan out of cardstock with a font I downloaded and installed onto my computer. When you install fonts on your computer those will be located under the System Fonts tab in Design Space, which I will show you later on in this article.
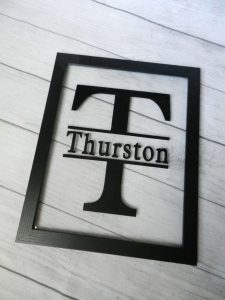
The third image is a Single-Layer Cutting font cut out of permanent vinyl and placed on glass for a split letter floating frame project.

The images below all show examples of Multi-Layer Cutting Fonts. You can click on any of the images to be taken to the tutorial for that specific project. The first image is a close up of a scrapbook layout that I created. I wanted the word stronger to stand out, so I used a Multi-Layer Cutting font for just that portion of the scrapbook layout. I like how the font not only has a shadow layer, but there are also little details cut out of the letters to allow the color of the shadow layer to peek through.
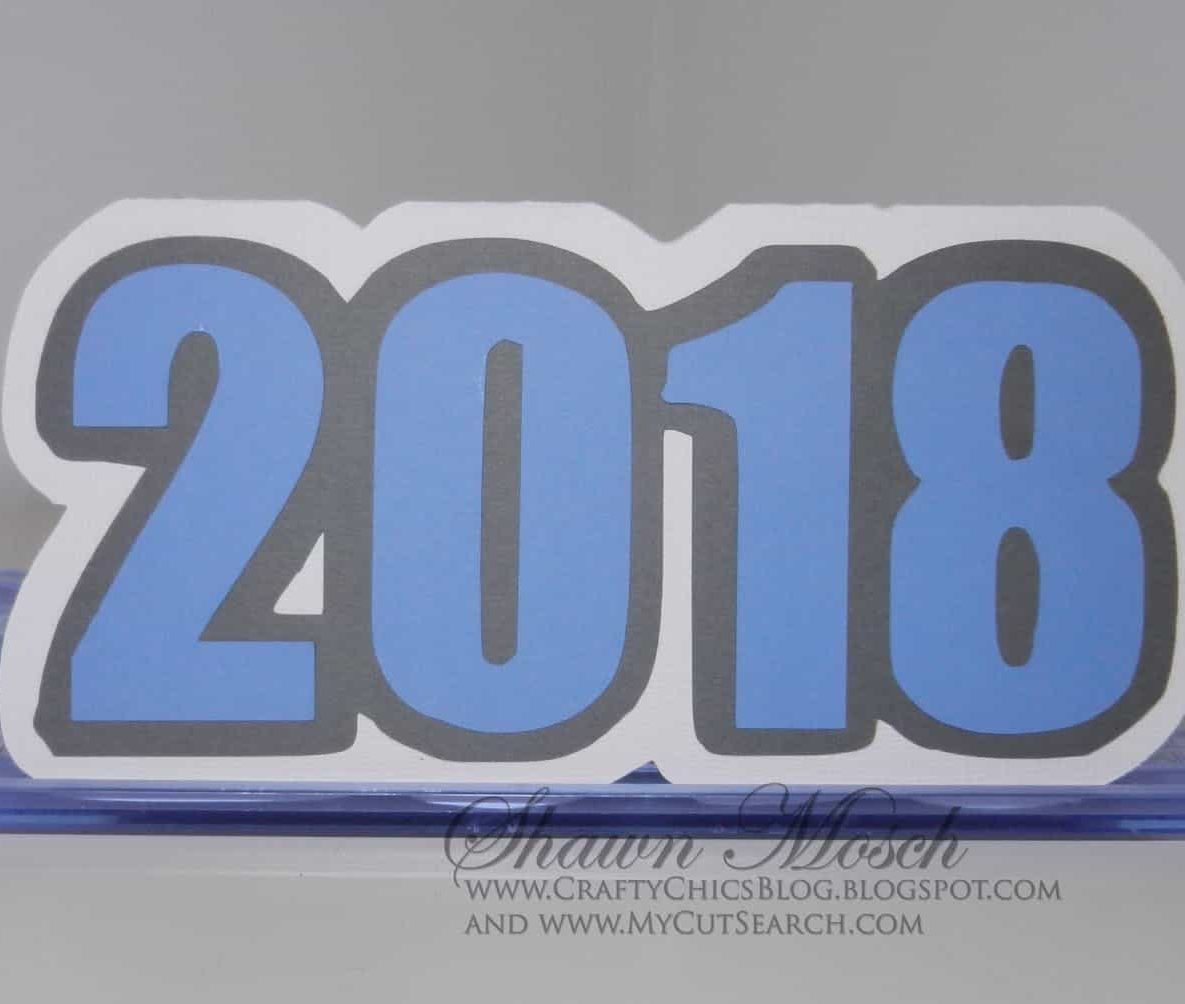
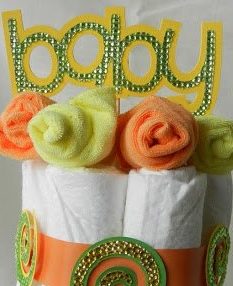
The second image is a shaped number card. With this card there were three letters to the Multi-Layer Cutting font, which allowed me to use all three colors you see in this design. The third image is a cake topper that used a Multi-Layer Cutting font that I made for a baby shower decoration.

Tips for using Cricut Fonts
If you forget if you are using a writing font or a cutting font, you can click on the text can look on the top panel in the Operation section. When I click on the Cutting Font in the image below, it says Basic Cut in the Operation. Additionally it says Regular in the Style pull down, which I have circled in pink in the image below.

If the font you picked indicated that it had more than one style included with it, verify that you have the style you wanted to use selected from the Style pull down that is circled in pink in the image above.
If you would like a video that covers all of this information, you can head over to my YouTube channel.
Non Cricut Fonts or System Fonts
System fonts are any font that you have downloaded and installed onto the device you are using. For the most part, a System Font will be a Single Layer Cutting Font. There are some exceptions, but you can use this as a basic rule of thumb.
DaFont is one of the places that I get my non Cricut fonts from. Once you find a font you like, you can download the file, and then you have to install the font to the device you are working on. If you want to be able to use that same font on your computer, tablet and phone you will have to install it on all three devices. If you don’t see the font in Design Space right away, you might have to close out of the program and re-open it.
Other resources that I recommend for fonts include Creative Fabrica, Font Bundles, Creative Market and Single Line Fonts.
Remember: You do NOT Upload fonts to Cricut Design Space. You Install non Cricut Fonts to your device.
To download and install fonts on a computer, watch this video.
To download and install fonts on an iPad, watch this video.
If you are making a design and the majority of the design is text, start to explore and play around with the large variety of text that is out there. You can also use a dingbat font as a cutting image like I did for this project HERE.
Fill in Cricut Fonts – Cricut Hack
If you have ever set up a project using a cutting font and change the Operation from Cut to Draw, you probably noticed that the end result is a font that is just a “bubble” outline. This is because the blade and the pen will follow the same path, and a Cutting Font is set to cut the depth of a letter like you would use when cutting letters for an iron on vinyl project.
Many crafters want to know how to fill in, or color in, those letters. I did that on the image below and then had the Cricut engrave the outline and engrave lines back and forth to fill in the letters. This look can be achieved with a Hatch Fill or using the Offset button, but having the offset go to the inside of the letters.
If you want more details on this Cricut hack, you can go to my full article HERE.

Free Cricut Fonts
If you are looking for free fonts to use with your Cricut you can check out my article HERE that will show you how to find free fonts and how to use them.
I hope that this helps you to understand how to find a writing font or cutting font and what the differences between them are.
What to know a secret?
Guess what? I was once in your shoes! I was once a Cricut beginner! You can actually look way back on this blog and find my early posts and see how far I have come on my journey!
You can also see that I love helping people. I think we should spend more time having fun crafting than trying to figure out how to use a software program! This is why I break everything I know into easy to follow steps. And because I have written down the steps, added screen shots and videos, you will know that you have the best resources for learning.
I also use a lot of analogies in my tutorials. If I can relate something in the Cricut Design Space software to an every day situation or something most people would encounter in every day life, I feel that helps people to learn. One great example of this is how I compare Cricut Access to Netflix.
So if you feel like you are always struggling with Cricut Design Space and wish there was one place you could go to learn how to use all of the buttons and features so you could spend your time just enjoying crafting then you should check out my Teach Me Cricut Design Space Online Course. This course is like having a direct line to my brain and downloading all of the information I know about using Cricut Design Space!
Learn step-by-step how to master Cricut without feeling overwhelmed even if you’re a complete beginner.
Discover Your Cricut’s Full Potential and Start Crafting Like a Pro!



6 Responses
Great article, but I still do not know how to tell if the font is writing or cutting before I download them and upload into design space. Is there any way to tell before going through this process?
Most fonts that you download are going to be a cutting font. When you look at the font if there is any thickness to it then it is a cutting font. If it is super thin, like the point of a pen then it could be a writing font. Does that help?
You are an amazing person! With one sentence from you I now understand layering. The sandwich analogy is perfect. I am now looking forward to get back together “Cricutting”.
And I will be back many, many time!
Thank you!
Your article, with all the detailed explanations is GREAT!. Simple to understand and to the point!! Thank you !! I agree with the person commenting before me… You are an amazing person Shawn Mosch!
It seems not all Cricut writing fonts are single-line. They still convert to outline when I select Draw. “BFC Vintage Stamp” for example is the one I want to use. It says “Writing” but it clearly is not single-line font. So what does “Writing” mean then?
I had to go and look up that font, and it seems you have found the exception to the rule. Most times a writing font will be a single line. The BFC Vintage Stamp font looks the same as if you changed a cutting font’s operation from cut to draw.